I had so much fun making my quilt with rounded corners yesterday, that i just had to share it with you all for today's tip. It is very simple, I would even say easier than the traditional corner.
Start by finding something round. I simply used a Pyrex mixing bowl. Just choose whatever size you want your corners to be, and follow my pictures from there.
Good Luck, and have fun with it!
As always, thanks for coming by, and feel free to contact me with any questions, or comments.
It's Monday, and I am happy to say that I finally wrapped up this jelly roll quilt! The top has been done for a few weeks now, and has been patiently waiting for me to finish her up. I must say that I am slightly in love with quilting in a spiral design. I just love how it looks. I guess I am really getting into the geometric stuff!
I decided to try something new and round the corners on this baby, and I am also in love with this now! I will absolutely be doing more!
What a week! We are experiencing a typical spring, here in Washington. The weather can't decide if it wants to be nasty or nice. One day we were out at the ball park sweating our buns off, and the next, freezing them off! Then, last night, during my daughters practice, the sky's opened up on us, and we lost the battle. But it was another good week despite it all. I was able to wrap up this full sized quilt for my friend, just in time for her to give it to her son for his birthday. I was inspired on this one, but the jelly roll races that I have seen from time to time while cruising the web. If you have never tried one of these, they are super fun, and I would suggest giving it a go. You can find instructions that I got inspired from here and here, as well as see a couple my daughter and I completed here.
Also accomplished this week, we caught two bee swarms, as well as harvested a couple quarts of honey from my original hive. There is nothing more rewarding than a sweet treat of honey!
So without further a do, I'll let the pictures speak for themselves. This quilt finished out at 81" x 96".
Today I am going to show you one of those pesky tricks that took me way too long to figure out!
I am simply going to show you how to join the two ends with a mitered seam. Making it flow, and since I join my binding strips together the same way, you would not be able to tell which one I end with.
Keep in Mind, I use 3" binding (double fold), and sew it to the front of my quilt first.
As always, thanks for coming by, and please feel free to ask any questions if I confused you!
I have been looking forward to this blog hop for what feels like forever! This is my first blog hop ever, and I could not have gotten a more fitting theme for myself. I just love a cup of coffee in the morning (and afternoon, and sometimes evening too, shhhhh!)
Let me start by saying how nice this fabric was to work with. The colors are great! Vibrant and lively, and really, the pictures do not do them justice. Check out the entire collection here.
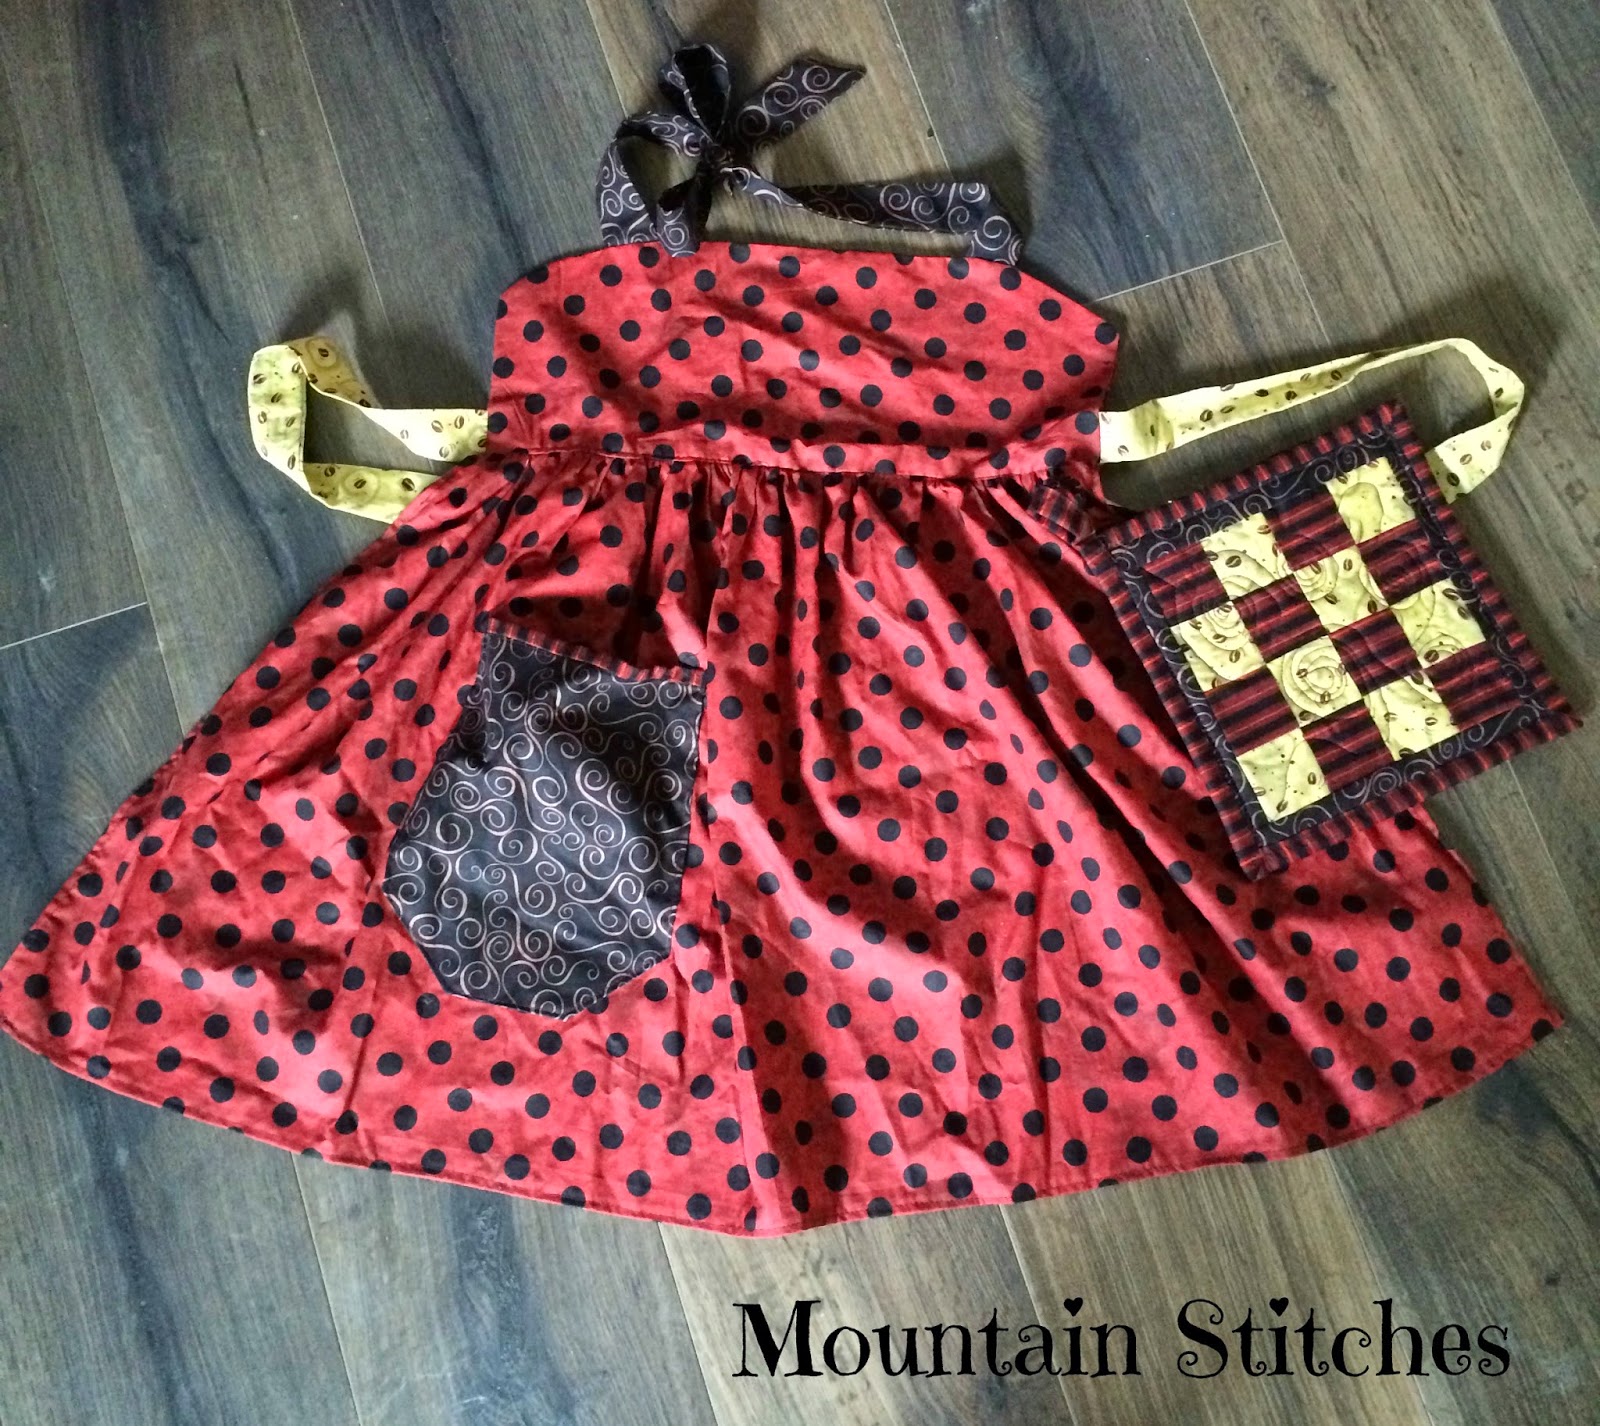
For those of you who have been to my blog before, you know how i love aprons. In fact, I am slightly obsessed. I just couldn't wait to get these red polka dots into an apron. This is a new pattern, and I have been asked to do an apron tutorial in May, so watch for that. I will probably do this style.
Staying with the kitchen theme, I also used the border print fabric from the line to create these super cute kitchen towels.
Next, What else would you need in the kitchen, but pot holders. I used the opportunity of a small project to jump into my free motion quilting (don't look close). I must say, it is not very easy, but I am going to keep practicing, because I love the effects that can be created with FMQ.
Finally, I must have something to catch those plastic grocery sacks. I usually use my reusable bags when grocery shopping, but there are always those last minute stops where I end up with plastic bags. I like to save them and reuse them for various things around the house. I just love to have a plastic bag holder in my pantry. And it couldn't get any more stylish than this.
Thanks to Mdm Samm and Joan at MooseStash Quilting for organizing this hop. It has been a fun experience for me, and I look forward to doing another one.
Please check out my fellow "hoppers". There are some amazing and talented people out there!
One thing that I took note of while working with my family this weekend, is how many times I had to remind people to lengthen their stitch length and loosen their tension when they were going to machine quilt with a walking foot. After getting everything sandwiched together and getting set to sit at the machine for a little bit, each one of my gals had to be reminded to do so.
This may seem like a very simple tip, but I assure you that if you don't want your stitches to come out short and tight, you want to remember to do this. Every machine is different, so refer to your manual if you are not sure how to lengthen stitches.
Also, once you think you have it where you want it, test it on a scrap sandwich.
Happy Quilting
~Corrie P.S. Here are a couple of the jelly rolls we completed this weekend. Unfortunately, I forgot to take pictures of everyone's.
Happy Friday everyone! This week I was asked by a close friend to make a quilt for her son for his birthday. I told her I may not get a lot of sewing done since the kids were on spring break, but low and behold, I was able to finish this mile a minute quilt top in one day!
If you have never done a jelly roll race, you have to try it! It is so fun and quick and I could not believe how fast it came together.
I didn't start with a jelly roll since I wanted certain colors and it needed to fit a double bed. But same concept.
So today it is off to the quilting table. I am excited to start working on him again!
Next week I am looking forward to my very first blog hop.
Welcome to the end of an amazing week. I didn't spend much time in the sewing room. I honestly don't even know where the time went, or what I accomplished. Now that baseball and softball are here, by they end of the day, I am beat! I have three different teams to run after this year, which sometimes creates some interesting juggling.
I did however get to finish a little Farm Boy Baby Quilt. This will be the gift for my sister-in-law, should she have a boy. The girl one can be found here.
I use these projects for my family and friends as times to practice and try out new things. Thanks to them for being my guinea pigs! The tan has a very cute little farm scene on it.
And I made a corner block in each corner.
I had never worked with minky before making these last two baby quilts, and they have been really fun to make, after I got past the fuzz blizzard in my room!
I think the back looks pretty cool. I wanted to get in a lot of quilting on this project to get to know my machine better, as well as learn to work with minky better. I think I've learned a few things.
Thanks for letting me share, now it's your turn! Link up at the bottom of this post.
~Corrie
+
Thanks to Mdm Samm at Sew we STITCH for this cute graphic. Hop on over there to get one for yourself!
Link up your projects, Finished, or Works in Progress, I would like to see them all!